Tuesday 25 March 2014

The GTX Titan Z

The word on the street is there is a new GPU on it's way and it is only going to set you back $2,999 US. It's the GTX Titan Z.
Read about it below from PCWorld
On Tuesday, Nvidia announced its next GPU, called Pascal, which will dramatically rearchitect the traditional graphics card by replacing the PCI Express bus and combining it with a new 3D memory technology. 
And for those who need a supercomputer now: Nvidia also announced its next-generation Titan card, the GeForce GTX Titan Z, starting at a whopping $2,999. Nvidia also announced what it calls the Iray VCA: a $50,000 virtual computing appliance for rendering images using modeled photons, to produce photorealistic images at up to 60 times the speed of today’s Nvidia-powered workstations. Finally, Nvidia announced the $192 Jetson TK1, an embedded development board to take its Tegra K1 to robots and computer vision, and disclosed the name of its next-generation Tegra chip, dubbed Erista.


nvidia pascal
Nvidia chief executive Jen-Hsun Huang holds up a Pascal processor module.

Nvidia will ship the Pascal processor in 2016, Nvidia chief executive Jen-Hsun Huang said during the keynote address of its GPU Technology Conference, which focuses on the application of GPUs in computational problems. The conference originally was predicated on Nvidia’s CUDA programming language, which allowed scientists to program a GPU much like a computer.
It will replace Maxwell, the graphics architecture Nvidia announced last month.
It's unclear how much Nvidia's work, as evidenced by the GPU Technology Conference, contributes to Nvidia's bottom line. But Nvidia has consistently seen growth for in its high-end, high-margin GPUs for the desktop and workstation, which has been partially offset by declines in PCs and notebooks. And problems that Nvidia can solve with its supercomputer GPUs can trickle down into the PC.


nvidia pascal image
The Nvidia Pascal module.

And Nvidia faces a thorny one. The problem, as Huang explained it, is relatively simple to express: GPUs are among the biggest chips ever created, but the demands for increasing GPU performance are unceasing. Accessing the memory used as a scratchpad for GPU computations can be improved by using a wider bus interface, but that adds more pins—and there can be a physical limit to how many pins can surround a chip. Simply forcing more data through those pins at higher and higher clock speeds increases the power consumed—and the heat produced—to unmanageable levels.
The answer, Huang said, was a twofold solution: NVLink, a replacement for PCI Express, which will offer between five and 12 times the performance of PCI Express; and the 3D interface, which will stack memory and other chips on top of one another, running via wires through the chips and the substrate to save space. The latter solution will help push memory bandwidth to 1000 times where they are now, Huang said.
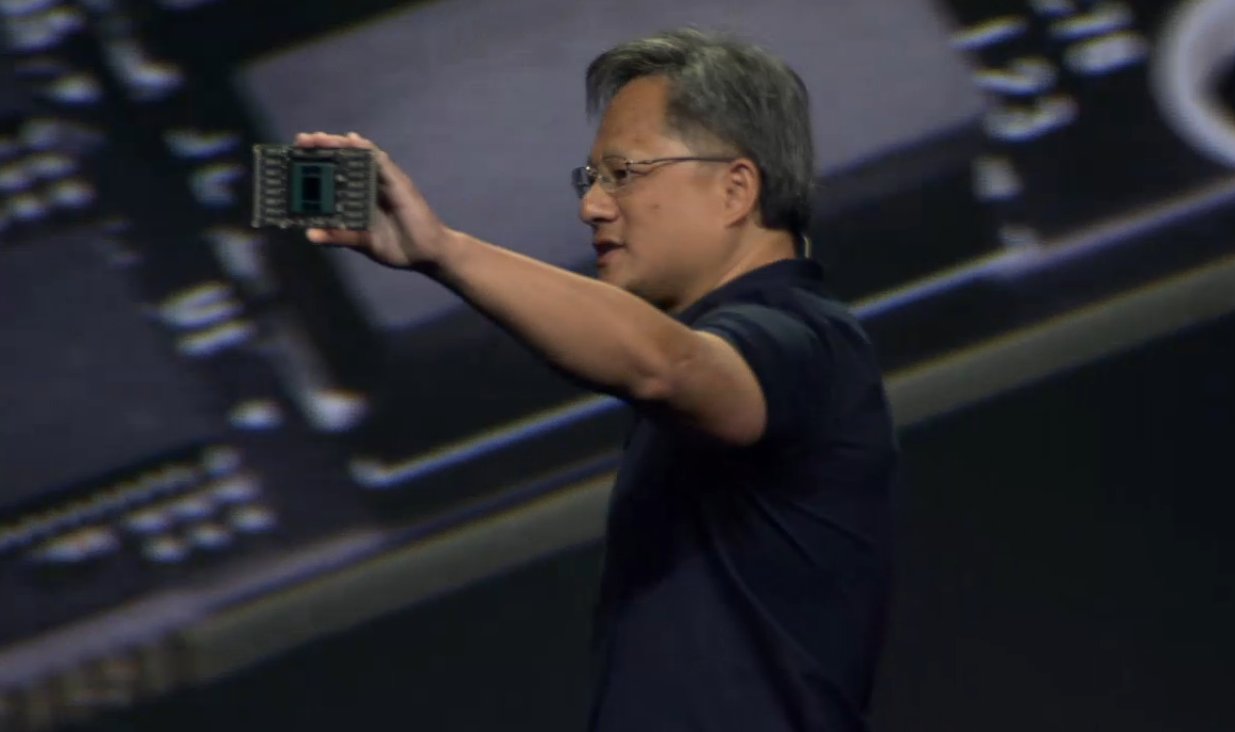
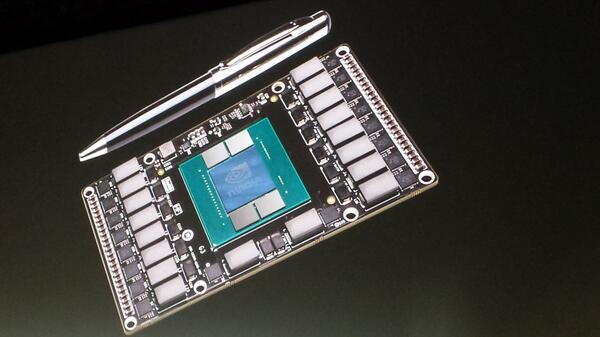
The module that Nvidia built to house the Pascal chip architecture is one-third the size of a typical PCI Express module, Huang said. A new connector will allow it to be plugged into the motherboard, Nvidia said.
NVLink was codeveloped with IBM, and will incorporated into the OpenPower architecture that IBM is spearheading, Nvidia said. NVLink will be used not only to connect a GPU to the motherboard, but also to connect GPUs to each other, with improvements of up to 5X in terms of GPU to GPU scaling, Huang said.


nvidia 3d memory

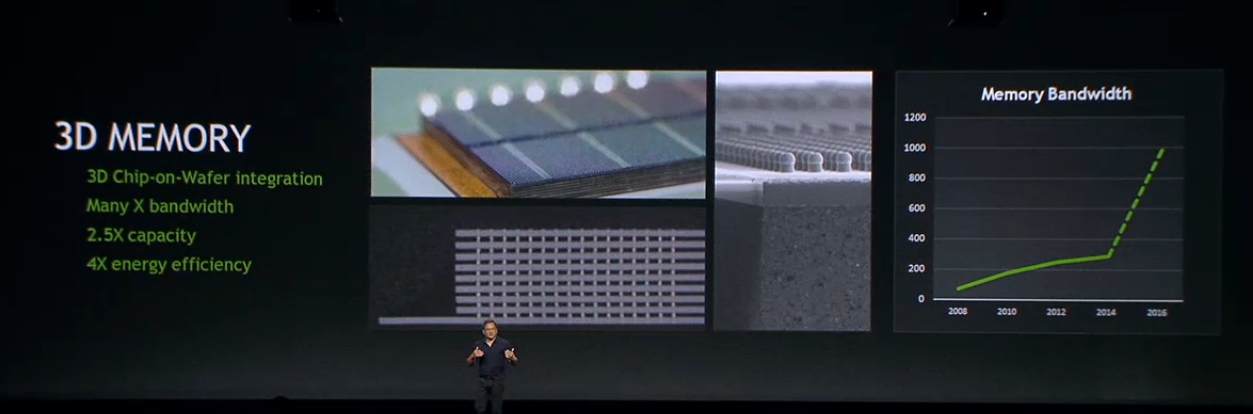
Likewise, scaling is one of the problems that the new 3D architecture will help solve. Nvidia’s existing Kepler architecture already provides 288 Gbytes/s of memory bandwidth, according to Huang, but that too will inevitably increase over time. By stacking memory and other chips on top of one another, “in a couple of years we’re going to take bandwidth to a whole new level,” Huang said.
The idea is to use these GPUs to not only solve big-data simulations of weather, economics, and other computationally intensive problems, but also render images photorealistically. And the next step, as Huang said, was to combine both: for example, Nvidia sent engineers to take high-dynamic range photos of the stage itself, then added a realistic car model in the center, and moved the “camera” about to explore it.


nvidia google brain

Combining realistic graphics with a dynamic scene has typically been the provenance of CGI movies, but that has also moved from the big screen to the computer monitor. Huang showed off a demonstration of the next-generation Unreal Engine 3 running on top of the new GeForce GTX Titan Z that looked, in places, completely real. But there’s obviously a price: the Titan Z will cost $3000, although it will provide 5760 CUDA cores with two Kepler cores inside of it, 12GB of memory, and 8 teraflops of computing power. Oh, and it will consume 2000 watts by itself.
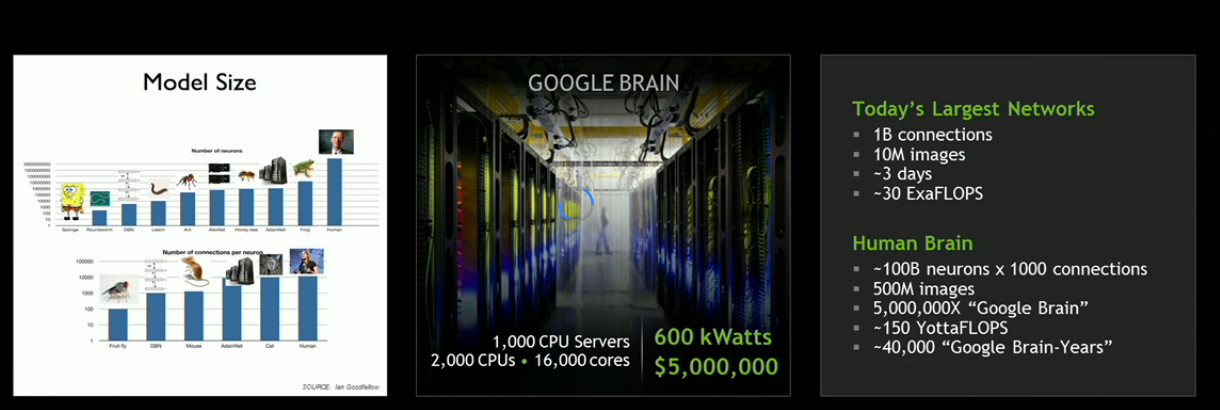
Pairing three of those GPUs together, Huang said, would provide the computational power of the “Google Brain,” the company’s effort to model the human brain that originally used a cluster of 16,000 computers. Just three GTX Titan Zs could be used instead, Huang said.


nvidia iray photo
The Nvidia iRay VCA.

And if that’s not enough, Nvidia has an Iray VCA to offer you. Essentially, the VCA is a remote server designed as a “render farm” for companies, taking a scene and rendering it as quickly as possible. The technology uses what Nvidia calls “Irays,” modeling photons that fly though the air, bouncing off objects and being absorbed by them. Each VCA contains 8 GPUs for a total of 23,000 CUDA cores, which can access 12 Gbytes of memory per VCA. Each VCA runs on top of mobile graphics packages like Maya and 3DS Max. “What would take an hour to render, now takes a minute,” Huang said.


nvidia gpu roadmap pascal
Nvidia's Tegra roadmap now includes the "Erista" chip.

Each Iray can be tied to others, using Nvidia software to connect them together and run them in parallel. Nvidia combined 19 iRays together to produce the equivalent of a petaflop—that's equivalent to the fastest supercomputer in the world, six years ago, Huang said. 


nvidia jetson tk1 embedded board
The Nvidia Jetson TK1.

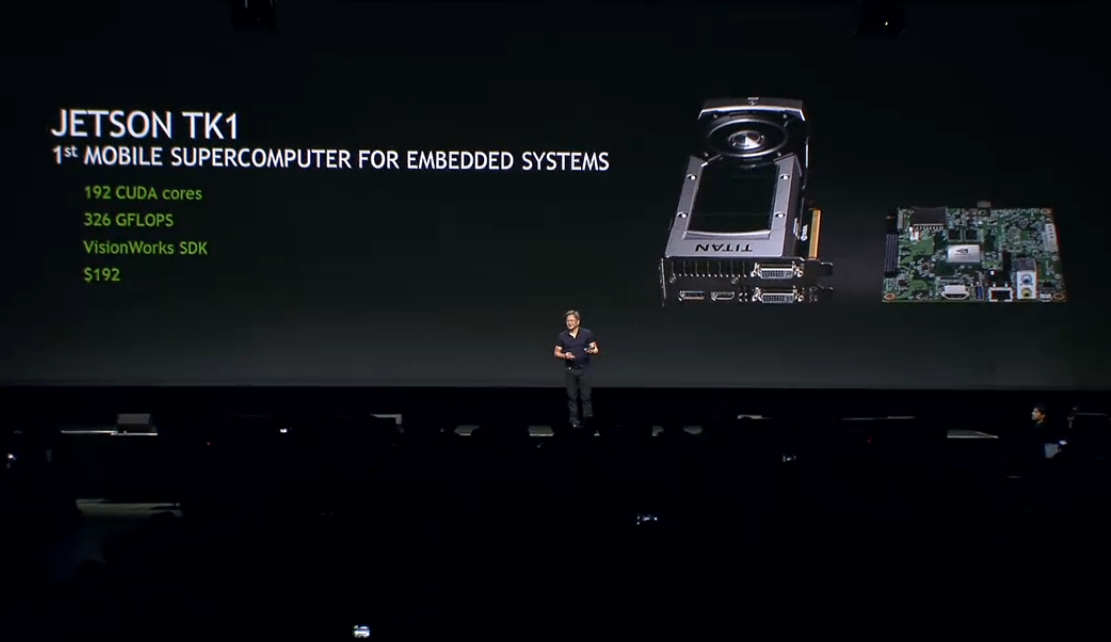
Finally, Nvidia showed off the Jetson TK1, an embedded module that takes theTegra K1 Nvidia announced at CES and brings it to the mobile space. Eventually, chips like the Tegra K1 and future iterations, like the Erista, will be the computational engine of Audi’s self-driving cars and more.
According to Huang, Nvidia's chips are all predicated on the CUDA technology Nvidia unveiled a few years ago. Can the company successfully expand beyond the PC? If you ask Huang, it's already happening.

RDT's April Build

RDT is offering its custom designed and built to perfection builds to you. If you are looking for a PC then this is exactly the right place.


RDT uses only the best quality parts available and all sourced from within Melbourne. Don't get ripped off by the compaction, RDT is 100% service based and will tailor to your needs exactly. The Build for this add is for the customers who wants something that will last.

ASUS Z87 Gryphon Motherboard
Intel i5 4670 3.4GHz (3.8GHz Turbo)
16GB Corsair Vengeance Pro 1866MHz Ram
128gb Samsung EVO SSD
1TB HDD storage
600w Silverstone Modular PSU
NZXT H440 Case (Black/White or Black/Red)

All these quality components plus a copy of windows 8.1 Pro comes to an incredible total of $1,399 includes Build/Installation cost. There are certain add-ons if needed suck as an i7 4770 or 4771 and many GPU's to choose from. This build is worth every cent as it comes down to the best components that you can put in a build that is made to last.

If you have any questions or want a build tailored to your needs please call RDT for a free quote.

Thank you.


PH: 0426279566

Samsung 28-Inch Ultra High Definition LED Monitor U28D590D


Today I was strolling around on Amazon and came across something pretty amazing, a 4k monitor that is well within most peoples budget. At $699 US it looks to be a pretty good by and considering it has a 60Hz refresh rate on display port its something that will surely impress.

go check it out: Samsung 4k Monitor


Sunday 23 March 2014

The NZXT H440 is Beautiful


Yesterday I picked up the amazing case by NZXT the H440. This is a premium quality case and has an sleek, elegant feel to it. I was unable to get my hands on the white edition of this case, which didn't bother me too much. As when I opened the box the black finish was done so well and really complemented the case.

 For this build I installed a Gigabyte Z87X-UD5 TH motherboard as it goes hand in hand with the colour theme. To show how much room you can have in this case I also installed two 360mm Radiators, One at the front and one at the back. As you can see the PSU is hidden under the NZXT logo which illuminates, glowing through the window panel.

Cable Management was way to easy in this case. You are able to have an incredibly clean build with minimal hassle.


 I went ahead and installed a basic water cooling loop for the CPU using the XSPC Photon 170 Pump/Res combo which is mounted behind the HDD stack. At the moment I am waiting on white tubing and a GPU waterblock to arrive so that I can do a full custom water cooled loop in this case.

All in all this case is going to take over from my full tower NZXT Phantom 820 as my daily driver. The simplicity and layout of this case makes it the best choice for anyone, it comes in white/black and red/black. I will be purchasing the white edition of this case as well.

Tuesday 11 March 2014

Aerocool has been water cooled

The Mini ITX build has been water cooled and running amazing. This is not for the faint hearted and as it did take a lot of planning to get everything into the system. The build is still yet to be completed with some more case modding and cable sleeving, as you can see everything is hidden under the motherboard tray and the original HDD cage has been removed and the pump and res have taken its place.
As you can see it's the ASUS Maximus VI Impact ITX board and it is beautiful, I'm using an XSPC Raystorm CPU cooler which covers most of the board. During the build process the plan was to stick to a white/black/red theme but I think I have gone overboard with the red. So I've ordered some clear tubing and white tubing to see how it looks. 
Planning was essential in this build as there is not a lot of space. There was an issue with having such a large reservoir that the fill port was not accessible with out cutting into the case which is a small compromise to have it working. 

All in all this build idles at 28 degrees with a room temperature  of 27 degrees and under a full load it maxes out at 48 degrees, which I'm my opinion is awesome for an over clocked i5 4670K @ 4.7GHz.

For anyone in purchasing this build through RDT please contact for a free Quote:
Ph: 0426279566
Email: deon@robertsondt.com 

Thank you for viewing 


Saturday 8 March 2014

The Little Maximus VI Hackintosh


The Little Maximus VI Hackintosh is a sweet little build of mine which of course uses the ASUS Maximus VI Impact which now is one of my favorite motherboards. For this build I used the Aerocool DS Dead Silent case with white and black. When using this case the only problem I had was with the power supply, you really can only fit a PSU thats about 160mm long without cutting out the HDD cage. For the rest of my parts list i'm using:

ASUS Maximus VI Impact
Aerocool DS
Corsair Domminator GT
Corsair H75
2x Samsung 128GB 840 Pro SSDs in RAID 0
1TB Seagate SSHD
Gigabyte R9 270X

These parts make a pretty sweet little build and looks amazing. I have also chosen to use Bitfenix Sleeved cables and sticking to a white/red/black theme.
This build is going to have a custom water loop and a GTX 780 added in the near future. At the moment this little beast is running amazingly on a triple monitor set up.

Thursday 6 March 2014

MultiBeast 6.2 UPDATE

http://www.tonymacx86.com/attachments/85039-software_update_big.jpg.html
MultiBeast, the ultimate post-installation utility, has been updated to version 6.2 for OS X Mavericks. This version contains updated kexts and fixes specifically for OS X 10.9.2.

Please make sure to read the documentation provided in the MultiBeast Features document and at MultiBeast.com for all install locations and details. Download the latest version of MultiBeast at tonymacx86.com/downloads.


Please do not upload or redistribute MultiBeast to any other sites.

Visible Changes:

  • Added Customize -> System Definitions -> Mac Pro -> Mac Pro 6,1
  • Added Drivers -> Misc -> VoodooTSCSync -> 4 Core
  • Moved Drivers -> Network -> Atheros - Shailua's ALXEthernet v1.0.2 to Drivers -> Network -> Atheros -> ALXEthernet v1.0.2
  • Added Drivers -> Network -> Atheros -> AtherosL1cEthernet v1.2.3
  • Added Drivers -> Network -> Atheros -> Killer ALXEthernet v1.0.2
  • Moved Drivers -> Network -> Intel - hnak's AppleIntelE1000e v2.4.14 to Drivers -> Network -> Intel -> AppleIntelE1000e v2.4.14
  • Added Drivers -> Network -> Intel -> AppleIntelE1000e v2.5.4d
  • Added Drivers -> Network -> Intel -> AppleIntelE1000e v3.0.4
  • Moved Drivers -> Network -> Realtek - Lnx2Mac's RealtekRTL81xx v0.0.90 to Drivers -> Network -> Realtek -> RealtekRTL81xx v0.0.90
  • Restored Drivers -> Network -> Realtek – AppleRTL8169Ethernet 2.0.6 as Drivers -> Network -> Realtek –> AppleRTL8169Ethernet v2.0.6


Internal Changes:

  • Updated AppleHDA.kext to 10.9.2 versions
  • Updated FakeSMC and Plugins to kozlek's branch v6.0.1123
  • Updated FakeSMC installer to delete any possible old versions and plugins.
  • Updated FakeSMC Plugins installer to delete any possible old versions.
  • Fixed saved config choice name being renamed or moved.
  • Added additional notification when a choice version in a saved config has been upgraded within MultiBeast.
  • Added support for future MultiBeast changes when loading saved configs.


Please support TonyMacX86 and donate.

Wednesday 5 March 2014

Gigabyte 4 DIMMS FIX Hackintosh

For some reason on some gigabyte motherboards there is an issue with the DIMMS cause the OS to crash and freeze up. Lucky this issue is noticed by the hackintosh community and can be fixed with some good old fashion trial and error. Over at TonyMacX86 a member OCULTO has typed up a fix which should resolve most peoples problems.

"Hi guys, just to share, I think I found the problem with 4 dimm memory instability on haswell gigabyte (Z87/H87)

I collect a lot of information about memory changes from z68/z77 to z87 and found that memory subtimings has changed, and now we have "haswell compatible memory" for some brands. I didnt find all changes but it clear to me that tRFC and tFAW have higher values now.

and comparing some memory brands who has 16GB (2 sticks) and 32GB (4 sticks) on the same model/IC, I also found tRFC and tFAW higher on the 4 sticks kit.

so, first conclusion is: HASWELL NEEDS HIGHER tRFC and tFAW and 4 DIMM needs even HIGHER values.


I dont know how other motherboard brands solve this, but gigabyte still isnt fix the 4 dimm problem on their boards, you can see a few users happy using brand new memories from QVL (gigabyte have a very small ones) but there is a lot of people still getting problems.

I have a old 16GB 4 DIMM memory kit with works fine at 2 DIMM XMP 1600Mhz 1.35v at my H87 board, but wont work at all with 4 DIMM. i try everything: lowering timing/latency, increase System Agent,, IO Digital/Analog voltage and several others tricks without success. But I didnt try on sub-timings values and when I see the values I notice that are VERY LOW tRFC and tFAW compating to other 4 DIMM kit. it seems tRRD is also related to tFAW, so i recommend higher a little (I use 8)

so, if you can try a little experiment with 4 dimm, do this:


1) note (or print/photo) all RAM TIMINGS you are using on XMP profile.
2) disable XMP profile and put memory timing on MANUAL
3) change manually all timings values to the XMP values you printed, but increase tRFC to 280˜310 and tFAW to 50˜80, also change tRRD to 8 or higher ..... it seems this could solve the problem with 4 dimm... (**)
4) adjust memory voltage to XMP values and memory multiplier to 1600MHz (depending on RAM, it could be changed...)
5) put the memory mode to NORMAL or ENHANCE STABILITY. verify if command rate is 2T


Reboot and check in BIOS if the values are ACTUALLY set (in my H87, they only changed after a cold boot: remove power cord - or turn of power switch if you have - for 20 seconds and turn on again). 


do a Cold boot and check if the values still there. 


then go to OSX/Windows and run some benchmarks. check the timing values inside windows (AIDA, Everest, etc. I don't know how to check in OSX) to see if it still there even if you reboot or cold boot. 


You don't need to change voltages or other settings with works well with 2 DIMM, just these two timing values. 


(**) these values almost double from memory kits with use double side ram or has 2 and 4 dimm configurations (same model/chip). So it seems theses values have direct relation with memory density. Also, older memory modules (launched before haswell) has 120˜160 tRFC and 28˜40 tFAW, but the new ones (advertising as haswell compatible) has higher values. tRRD is related to tFAW, the minimum possible value is 4 and some 4 dimm kits on gigabyte QVL has tRRD 6, 7 or 8. I recommend 8 for stabilty.


gigabyte bios has bugs, in my case it require a cold boot to change values, but i think it is possible to do manually solve this issue if we understand exactly where the problems is. 


share your comments here about this experiment. please. 


at least with my memory kit, it seems to be solved. I'm now running 4 DIMM 16GB 1.35v 1600MHz replicating XMP profile at manual mode (but increase tRFC and tFAW) without changing any other voltage parameters for 30 hours free of crashes."


Be sure to check out TonyMacX86 and stay updated. 

Sunday 2 March 2014

4k Budget TV Presale

Kogan may be a bit of a strange brand but when it comes to good deals this is too good to pass up and I have jumped on the 4K band wagon and going to pre-purchase one and hope for the best. When it's selling for $999AU + postage $25.51 (for Melbourne) it will hopefully be worth the purchase.

go check out Kogan for your self and make a decision.

UPDATE OS X MAVERICKS 10.9.2

For those of you who are looking to download the latest update to OS X Mavericks, it seem's to be relatively safe. Some users lose the audio drivers which is easily fixed through a simple re-install. If your system is running fine I HIGHLY suggest to leave it as is to avoid any tampering. 

Thanks for reading and stay posted.